Physical Address
304 North Cardinal St.
Dorchester Center, MA 02124
Physical Address
304 North Cardinal St.
Dorchester Center, MA 02124

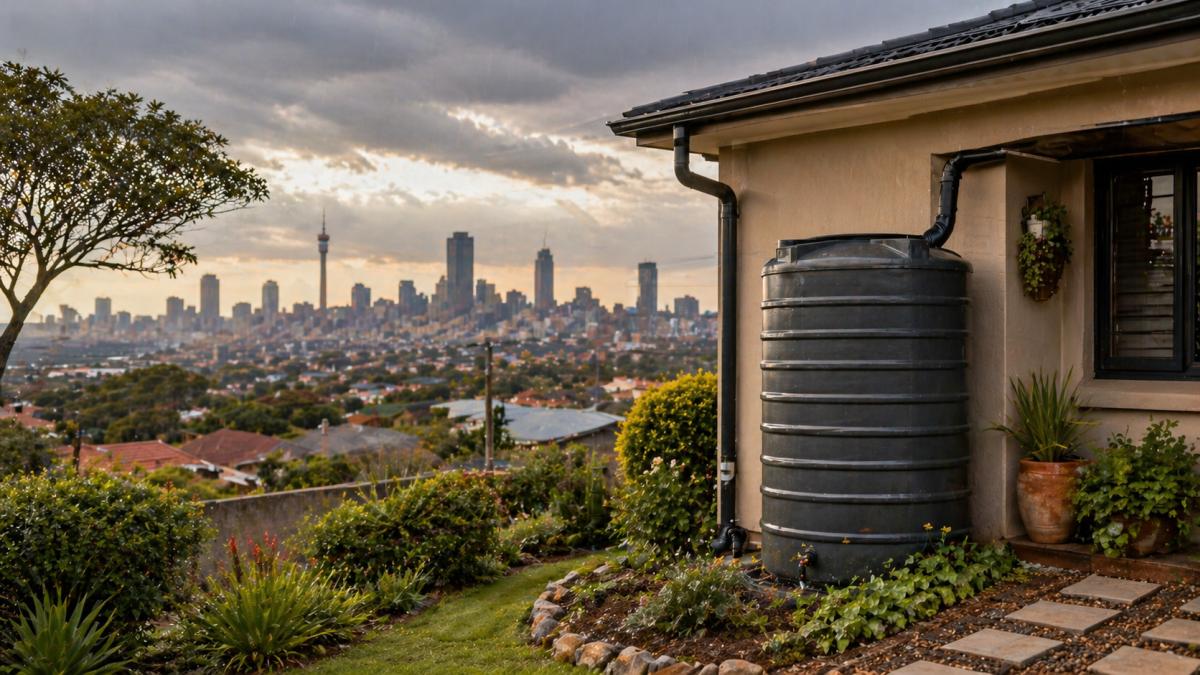
Solar panels and a rocket stove cover two of the three legs of household independence in South Africa. Power and cooking. The third leg, which most households still leave entirely to a municipal pipeline, is water. And in a year where Rand Water has pushed through a 15.3% tariff increase and municipalities across the country are passing the cost through to ratepayers, leaving that pipeline as your only source is starting to look both expensive and risky. Rainwater harvesting is not a fringe hippie project. Done correctly, it is a pragmatic infrastructure decision with a calculable payback period, and most of South Africa’s climate is far better suited to it than people assume.
South Africa’s rainfall splits into three broad regimes, and your harvesting strategy depends on which one you live in. The summer rainfall interior, which covers Gauteng, the Free State, North West, Mpumalanga, Limpopo, and most of the Eastern Cape, receives roughly 500 to 800mm a year concentrated between October and March. The winter rainfall belt around the Western Cape gets a similar annual total but spread across the cooler months from May to August. The subtropical east coast strip, including KwaZulu-Natal and parts of the Wild Coast, can exceed 1000mm spread more evenly through the year. Gauteng households can expect an average of around 700mm based on Pretoria’s monthly precipitation records, with December alone delivering close to 120mm across roughly fourteen rainy days, while July typically sees only 3 to 4mm.
That distribution is the single most important fact for sizing any rainwater system. In summer rainfall regions you are not collecting evenly throughout the year. You are catching a short, intense burst from October to March and then drawing it down for the next six dry months. Winter rainfall regions face the opposite challenge, with collection happening when garden demand is at its lowest. Either way, tanks need to be large enough to bridge the dry season, not just to catch a single storm. And first-flush and overflow systems need to handle thunderstorm intensity, not gentle drizzle. Summer thunderstorms across the interior can dump 25mm in twenty minutes. Your gutters and downpipes need to actually move that volume.
The textbook formula is straightforward. Multiply roof footprint in square metres by annual rainfall in millimetres to get litres of theoretical yield. A 100m² roof in a 700mm rainfall area gives you 70,000 litres on paper. That is the number you see in marketing brochures.
The real number is lower. Roofs do not collect with perfect efficiency. Some water is lost to evaporation off hot tiles before it can run, some is lost to splashing past gutters during heavy rain, and some is intentionally diverted by your first-flush system. A reasonable runoff coefficient for a corrugated metal roof is around 0.85, while concrete tile is closer to 0.75 and rough thatch can drop to 0.5. So a 100m² metal roof in a 700mm year realistically delivers about 59,500 litres into the tank. Plan for 60% of theoretical and you will not be disappointed.
The other variable is roof footprint, which is not the same as floor area. A double pitched roof projecting outward from the walls catches more rain than the floor plan suggests. Measure the actual roof outline from above, not the house outline. For most South African homes that adds 10 to 20% to the catchment area.
The temptation is to install the biggest tank you can afford. This is usually the wrong move. A 20,000 litre tank that fills only once a year and stays half empty for nine months is wasted capital. Your goal is to size the tank to the volume of rain you can realistically catch in your wettest single month and use through your driest stretch.
For a 100m² catchment in a typical summer rainfall area, the wettest month delivers around 9000 litres of harvestable water in an average year. Your tank needs to hold that one big month plus enough buffer to push through the dry winter at your intended draw rate. For a household using rainwater purely for garden irrigation and toilet flushing, that points to a 5000 to 10,000 litre tank. JoJo’s vertical water storage range covers exactly this band, with the 5250L vertical and the 10,000L tank being the two most common residential choices. The 5000L low profile slimline is worth considering if you are tucking a tank along a wall or under a carport. Households in the winter rainfall Cape, where collection has to last through summer drought, should size up by 30 to 50% to bridge the longer gap between fill events.
Two practical points on installation. First, build a proper concrete base. A full 5000L tank weighs five tonnes and an unstable base will crack the tank fitting within a year. Second, position the tank so the inlet is below the lowest gutter outlet. Gravity is free, electric pumps are not.
The first few millimetres of rain off any roof carry the worst of what has accumulated since the last storm. Bird droppings, dust, leaves, lichen spores, the residue of whatever flew over. A first-flush diverter is a vertical pipe section fitted between your gutter downpipe and the tank inlet, with a ball valve at the bottom. The first flow of water fills the diverter pipe and seals off the inlet to the tank with a floating ball. Once the diverter is full, clean water flows past it into the tank. After the storm, a slow drip valve at the bottom empties the diverter pipe ready for the next event.
The rule of thumb is one litre of diverter capacity for every square metre of roof. So a 100m² catchment wants a 100L first-flush, which translates to about 4m of 160mm PVC stormwater pipe. You can buy commercial units, but a DIY build using standard hardware store fittings costs under R600 and works just as well.
Mesh filtration sits in two places. A leaf catcher at the gutter outlet, ideally a downpipe filter with a stainless mesh insert, removes the larger debris before it gets near the diverter. A finer mesh, usually 0.5mm to 1mm, sits at the tank inlet to catch anything the first-flush missed. The Department of Water and Sanitation’s rainwater harvesting guidelines spell out the mesh sizing for both potable and non-potable applications, and it is worth following them even if you only intend to use the water on the garden.
Garden irrigation is the easiest and highest-payback use of rainwater for most households. Plants prefer rainwater anyway. It contains no chlorine, no chloramine, and a slightly acidic pH that suits most South African soils better than alkaline municipal water. A tank elevated even one metre above the garden bed gives you enough head pressure to run a basic drip line system without a pump. For sprinkler heads or pressurised drip systems you need 1 to 2 bar, which means either a pump or a tank stand at three to four metres.
The cheapest functional setup is a 12V DC pressure pump wired to a small solar panel and a battery, drawing from the tank and feeding a manifold of drip lines. Total parts cost is under R3000 if you scavenge a battery from an old UPS. A more polished setup uses a 220V Kärcher style pump with a pressure switch, which kicks in only when you open a tap. For a household already running solar, the marginal cost of running an irrigation pump off your existing inverter is essentially zero.
For permaculture-style installations, the better approach is to bypass irrigation altogether. Direct overflow from the tank into a swale or a banana circle and let the soil store the water for you. The tank becomes a buffer rather than a storage end-point. This is the design pattern that Geoff Lawton’s dryland water harvesting work has demonstrated repeatedly across drier climates than ours.
This is where rainwater harvesting moves from environmental gesture to financial decision. Rand Water raised its bulk tariff by 15.3% from 1 July 2025, as documented in Rand Water’s tariff consultation document, and metros across Gauteng have passed most of that through to residential ratepayers. Cape Town, eThekwini, and Nelson Mandela Bay have all implemented their own above-inflation increases over the same period, driven by infrastructure costs and bulk water purchase escalations. Stepped residential tariffs apply almost everywhere, meaning the more water you use, the more each additional kilolitre costs. A household pushing into the upper consumption block now pays well over R30 per kilolitre once stepped tariffs and sanitation charges are stacked.
A worked example. A four to five person South African household typically uses 18 to 25 kilolitres per month, of which 30 to 50% goes to garden, toilet flushing, laundry rinse, and outdoor cleaning. Replacing 8 kilolitres per month of municipal water with harvested rain saves roughly R200 to R350 per month, depending on which tariff bracket you are sitting in and whether you breach the next step. Annualised, that is R2400 to R4200 in direct billing avoidance.
A complete installation, comprising a 10,000L JoJo tank, a concrete base, gutter modifications, a first-flush diverter, mesh filtration, a small pump, and basic plumbing into a garden manifold, lands around R18,000 to R25,000 if you do most of the labour yourself. Payback at the lower end of savings is six to eight years, at the higher end four to five years. Tariff increases shorten the payback every year. If Rand Water continues raising at 12 to 15% annually, that 25 year payback math accelerates dramatically. BusinessTech’s coverage of the 2025 tariff hikes shows the trajectory clearly.
Solar gives you electricity independence. A rocket stove or wood stove gives you cooking independence. A rainwater system gives you water independence, and the three reinforce each other. When the next municipal water shedding event hits your suburb, and there will be one, your tank carries you through. When loadshedding takes out the pumping stations, your gravity-fed garden does not care. The three systems together remove the household from the most fragile parts of the South African infrastructure stack, and each one shortens the payback period of the others by reducing your dependence on services you would otherwise have to buy back at higher and higher prices each year.
Start small if budget is tight. A single 2400L tank on the most accessible downpipe, costing under R3000, will already meaningfully offset garden water bills. Add a second tank later, daisy-chained to the first, and gradually expand the system as cash allows. Self-sufficiency does not have to arrive in one purchase. It arrives in stages, and each stage pays for the next.







[…] Rainwater Harvesting Before the Next […]